
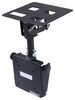
Gustafson RV Drawer Pull - Oil Rubbed Bronze - Twist Design - 3"
(0 reviews)
Price: $3.43
In Stock
Gustafson RV Drawer Pull - Oil Rubbed Bronze - Twist Design - 3"
Item # 277-000372
Our Price: $3.43
In Stock


Need help with installation?
Locate installers near me- All Info
- Q & A (0)
- Videos (1)
- Photos
Gustafson Lighting RV Cabinet and Drawer Hardware - 277-000372
- Pulls and Knobs
- Cabinet Hardware
- Drawer Hardware
- Oil Rubbed Bronze
- Gustafson Lighting
- Twist
- Oil rubbed bronze colored drawer pull
- 3-Hole mount
- Mounting hardware not included
- Mounting hole spacing: 3" center to center
- Overall dimensions: 3/4" tall x 4-1/2" wide x 1-1/4" deep
- 1-Year warranty
GSA7114 ORB Twist pull


Video of Gustafson RV Drawer Pull - Oil Rubbed Bronze - Twist Design - 3"


Videos are provided as a guide only. Refer to manufacturer installation instructions and specs for complete information.

Video Transcript for Gustafson Oil Rubbed Bronze RV Drawer Pull Review
Hey guys, it's Randy here at Etrailer.com. Now there are tons of ways that you can customize an RV to either make it into your own style, or update it, make it look a little bit more modern. This is an early 2000 RV that we've got and this is what it had in it. You can see we've been able to change that out for an oil rubbed bronze. Has a nice twist to it, gives it almost a handmade or a wrought iron look. And just gives you a lot of room to get your handles in there.
You can imagine by changing it from this older, very dated looking handle to a new fresh handle like that, that you really change the overall feel of your RV. Now as far as dimensions go on it if we go from the very top to the very bottom, we're going to have about four and a quarter inches. At its widest point it's going to be about three quarters of an inch. And then you can see there it's going to stick up about an inch and three eighths off of your mounting surface.Now to install this one in and to make sure it's going to work for you what you're looking for are for your screws to be at three inches on center. So for center here to center here, three inches.
But as long as you meet that requirement, it's going to be a great replacement part. Let's take a look at that process now. Now as far as the replacement process, of course we need to get our old handle removed. This is also where you're going to check to make sure that you have the three inch centers. So once you open that you look on the back side.
See we've got a screw here and a screw here. We just want to make sure that those are on three inch centers and this is going to be a great replacement. At that point, just going to use our Phillips screwdriver. Most of these are Phillips, I guess sometimes you might run into a flat head or something. But nine times out of ten you're just going to need a Phillips screwdriver.Just going to take both of those out.
And with that pulling our handle is just going to come off. And we'll want to hang onto those, we'll reuse them when we put our new handle in. And once we've got that one out of the way, I'm just going to place our screw back in. Place our handle in the front, begin to thread it in. Remember, we're reusing that old hardware. So we get the top started, we get the bottom one started here. And then just snug it up, move on to getting the rest of ours done. And as you guys can see, just a super quick and easy way to really modernize your RV, or change it to your own personal style. I think they're nice, solid, they line up really well, the screws thread in well. Think you'd be happy with it.
0
0
See what our Experts say about this Gustafson Lighting RV Cabinet and Drawer Hardware
Info for this part was:

Expert Research:
Jameson C

Video Edited:
Jacob T

Installed by:
Randy B

Written by:
Mary K

Updated by:
Wilson B

Updated by:
Isabelle B

Video by:
Zach D
At etrailer.com we provide the best information available about the products we sell. We take the quality of our information seriously so that you can get the right part the first time. Let us know if anything is missing or if you have any questions.
Thank you! Your comment has been submitted successfully. You should be able to view your question/comment here within a few days.
Error submitting comment. Please try again momentarily.